The Ultimate Guide To DIY Eavestrough Repair

Also known as rain gutters, a DIY eavestrough repair is an essential component of your house. Its primary purpose is to catch water from your roof and drive it away from your home’s foundation.
It’s a clean and basic process. However, when you find out your eavestroughs have damage and malfunctioning, water will slide off your walls and can easily enter your home.
In such cases, prepare yourself for potentially annoying home problems, such as the presence of mold and mildew, poor indoor air quality, potential health risks, and hydrostatic pressure in the soil, which can cause damage to the foundation of your home.
But because eavestroughs are generally plain and simple, in some cases, so does the repair it needs. Now, you’re probably wondering how. In this ultimate guide, you’ll learn essential things you need to know about DIY eavestrough repair.
On the other hand, if you’re not confident about doing the job all by yourself, it’s always best to seek professional help. You may visit this website to learn more.
What Do You Need During DIY Eavestrough Repair?
The tools and equipment often required during DIY eavestrough repair are simple. You can find all these in any hardware shop and other DIY stores in your area. To help you get started, here are the tools and materials you need:
Tools And Equipment
- A sturdy and durable ladder that can be extended to a height of four meters—for single-story homes. For two-story homes, choose a ladder with an extension up to eight meters.
- A bubble level
- Hammer
- Tin snips or shears
- Garden hose
- A cordless power drill and drill bits
- Screwdrivers
Considering you’ll be working and moving while using a ladder, it’s recommended to have someone with you who can help you with the project to ensure the ladder won’t wobble.
Materials
- Gutter sealant
- Screws and nails for DIY eavestrough repair
- Downspout straps
- Downspout drop outlet
- Flashings
- Gutter apron
Once you have all the essential tools and materials, you can be better equipped to deal with and handle the different issues that DIY can address.
How To Fix Loosened Downspouts?
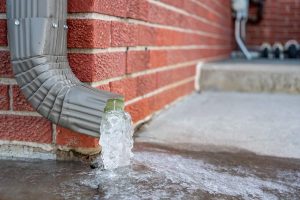
Downspouts are enclosed vertical pipelines that lead rainwater from your roof to the ground. These are attached to your eavestrough using screws. However, when these screws become rusty, torn out, or gone missing, downspouts will start to loosen up.
When the downspout loosens from your eavestrough, the straps that keep them intact to the side of your house will start to loosen up. It will cause the downspout to disconnect from your eavestrough completely and fall from your home.
To fix loosened downspouts, you can start by fitting a drop outlet to your eavestrough. Then, use a gutter sealant and some screws to keep it in place. After that, fit the vertical pipeline to that outlet.
To do that, use a couple of screws to keep them attached. From there, use metal straps and screws to attach the downspout to the side of your house.
How To Fix A Sagging Eavestrough?
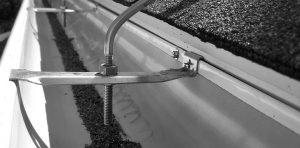
A sagging eavestrough can be characterized by a curvy (sag) line that’s supposed to be straight. To help you determine possible sagging, you can use a bubble level.
When you place the bubble level lengthwise, the bubble must remain stable in the center. This will tell you that the eavestrough is fine or has been fixed properly. If not, this could be a tell-tale sign that you have sagging issues.
This issue can occur due to large volumes of water accumulating and standing in your eavestrough. When this happens frequently, the hangers within your eavestrough will loosen and sag eventually. The sagging could also be a result of a rotten fascia board, which may cause the fasteners to loosen their grip.
Here are the two ways to fix a sagging eavestrough:
- Short-Term Solution: Start by attaching a couple of plastic shims between the fascia board and the back of the eavestrough. Thrust these shims upward and pin them in place to prevent them from falling.
- Long-Term Solution: Take your eavestrough out and replace the wooden fascia board with one made with PVC (polyvinyl chloride).
How To Remove Clogs From Your Eavestrough?
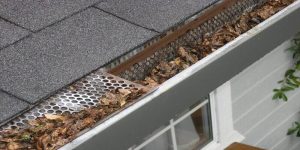
Without proper maintenance, elements such as leaves, small twigs, and small stones can accumulate and clog your eavestrough and downspouts over time. And so, when the rain starts to pour, water flow may be blocked and can cause your eavestrough to sag due to the extra weight it had to carry.
To rectify this issue, it’s recommended to de-clog regularly. You can climb up using a ladder to manually remove the accumulation of debris in your eavestrough. Furthermore, you can use a hose to water down the downspout. If the water flows out of the downspout without any sign of blockages, it means that you have eliminated the clog properly.
On another note, if the debris is located within the curves and elbows of your eavestrough and downspout, you may need to disassemble them and clear all the clogs using a water hose.
How To Fix A Leaky Eavestrough?
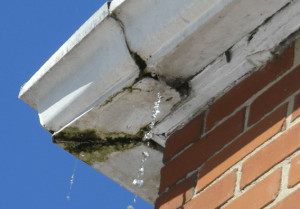
A leaky eavestrough is one of the common roofing issues homeowners encounter. It may occur at the sides and across the eavestrough or at the ends of the downspouts and endcaps. Among the reasons why leaks happen are the formation of rust and cracks.
If your eavestrough is made of steel, expect that it’ll rust eventually, which may cause them to leak. However, other materials—vinyl (PVC) and aluminum—may also develop cracks and holes when damaged. They might get damaged when clogged with stones and a pile of leaves.
To fix a leaky eavestrough, put the endcaps back in place and seal it with a gutter sealant. When it comes to holes and cracks, you can use a piece of flashing and gutter sealant to patch the damaged areas.
How To Correct The Slope Of Your Eavestrough?
Another issue that you may encounter in your eavestrough is stagnant water. In this case, the water has stopped flowing down the downspouts.
And in some instances, there could also be backflow issues, wherein the water may flow backward in the opposite direction of the downspouts. While these problems are different, the reason behind them is the same: inadequate sloping.
In such a case, the eavestrough may not have been installed correctly. It could also be due to its fascia; it may be starting to fail, causing changes in the slope.
To fix this issue, you may remove the entire eavestrough and its mounting brackets. If the fascia has already been damaged over time, consider replacing it with a new one. From there, you could install the new eavestrough.
How To Deal With Water Behind The Eavestrough?
If there’s water leaking behind your eavestrough, it’s most likely due to improper installation. Perhaps it could be the eavestrough was installed with no flashing behind it. To prevent the leaking, you may use a gutter apron.
A gutter apron is a small piece of bent flashing that can be attached underneath the shingles and above the eavestrough. You can purchase this in most hardware stores in your area or online.
When installing it, it is essential to check if you need to remove the hangers. You can then put the apron and keep it attached using sheet metal screws. If your eavestrough has a drip edge between the fascia and the shingles, insert the aluminum flashing under the drip edge.
Aluminum flashing may come in various measurements, and you can use them if your eavestrough is made of aluminum or PVC. Alternatively, if it is made of steel, steel flashing can be your best option. It is especially true as aluminum may corrode in the presence of galvanized steel.
How To Deal With Spilling Eavestrough?
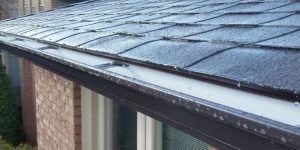
Some roofs have a long, curvy course that carries significant amounts of rainwater at extremely high speeds. When that rainwater arrives at the curved area, it can blast its way out of the gutter, causing annoying spills that may slide through your walls and seep inside your home.
When this happens, a diverter may be able to help you fix this issue. A diverter is a small metal that can help redirect the water toward its proper course where it belongs. It can be attached to the outside edge of the eavestrough using a couple of screws.
When Do You Need To Replace Your Eavestrough?
Ideally, you might want to consider installing a new eavestrough if at least one of the following issues takes place:
- Tons Of Cracks And Holes: A couple of cracks, holes, and fissures can be fixed with a flashing patch. However, too many of these may call for immediate replacement.
- Paint Starts To Erode: When the paint of your eavestrough starts to erode, it has already started pulling away from your roofing system a long time ago. In addition, it can indicate a more critical problem that needs to be dealt with.
- Screws And Fasteners That Keep Falling: If your screws and fasteners continue to loosen, your eavestrough can be at risk of getting worn out easily. If you notice your home’s eavestrough to sag or pull away from your house, it may be time to have it checked and replaced.
Final Words
DIY eavestrough repair may seem pretty daunting, especially for those who don’t know anything about it. But with proper knowledge and guidance, you can execute this task perfectly and flawlessly.
However, when in doubt, it’s always best to seek professional help. These experts have full training to perform various tasks concerning your roof’s components. And can help ensure your concerns are taken care of efficiently.


